As a small business owner that advertises on Facebook, you might have heard of the term ‘Facebook Pixel’ tossed around in when you’ve been adding your ads to your account. But what exactly is it? Why should you care? And how can it help your business grow? In this article, I’ll try to explain in simple terms what a Facebook Pixel is, explain its uses, and outline its pros and cons and lastly show you one of the ways to add the code to your site.
What is a Facebook Pixel?
A Facebook Pixel is a small piece of code that you can place on your website. This code allows you to measure, optimise, and build audiences for your advertising and retargeting campaigns on Facebook.
In simpler terms, the pixel ‘watches’ the actions that people take on your website and then reports these actions back to Facebook. You can then view this information in Facebook’s Ad manager, it can help you understand your customers better as you can see exactly what people are doing on your website after following an ad, refine your advertising strategy when you work out which ads are working better then others, and ultimately, improve your return on investment (ROI).
How Does a Facebook Pixel Work?
When creating facebook ads you have to create target audiences (made up of people that are your potential customers). When up and running it’ll show your advert on Facebook as well as Facebooks other apps like messenger and instagram to people who are in your target audience.
When you create an advert you have a few options to choose from one of which is setting your ad to send people to your website.
The pixel works by triggering cookies that tracks your website visitors as they interact with your website and Facebook ads. For example, if a person visits your online store and looks at a one of the bags you have for sale but doesn’t make a purchase, the pixel will ‘remember’ this.
Once someones views your ad and follows the link you can create retargeting ads as part of retargeting campaigns and help build brand visibility.
Retargeting Campaigns
A retargeting campaign (sometimes known as a remarketing campaign) shows ads for the product they viewed over and over again to encourage them to return to your website and make a purchase. This is an incredibly powerful tool for boosting conversions and sales.
A facebook pixel doesn’t need to be across your whole site either, for example if you have a landing page on your website for a special offer you’re running you can just apply a pixel to those specific pages.

Pros and Cons of Using a Facebook Pixel
Like any marketing tools on social media platforms, the Facebook Pixel comes with its own set of pros and cons that you will need to weigh up to see if its the right option for your business.
Pros:
Improved Ad Targeting
The pixel helps you target your Facebook ads more effectively. You’re able to target people who look like your potential customers by creating target audiences. Once you have enough data you can also create your own custom audiences that you can use when creating retargeting ads so that you can reach people who have shown an interest in your products or services, leading to higher conversion rates.
Retargeting Capabilities
The pixel allows for retargeting, showing relevant ads to users based on their past actions on your website.
Conversion Tracking
With the pixel, you can track what users do after clicking on your Facebook ad, whether they purchased a product, signed up for your newsletter, or filled out a form. Seeing a buyer’s journey from start to finish will help you optimise your ads or landing pages to increase conversions.
Cons:
Privacy Concerns
As the pixel involves tracking user behavior, there may be privacy concerns. It’s important to update your website’s privacy policy to include information about the Facebook Pixel and obtain user consent where necessary.
Technical Setup
Setting up the pixel can be technical and might require some time to get it right, i’ve popped in a little guide towards the bottom of this article so you can see how to do it on a WordPress website.
Dependence on Facebook
Using the pixel means you are relying on Facebook for a part of your digital marketing strategy. If Facebook experiences downtime or changes its policies, it could impact your advertising efforts.
What to Do Before Adding a Facebook Pixel to Your Website
Before you add the Facebook Pixel to your website, it’s crucial to update your website’s cookie and privacy policies. These should clearly state that you are using Facebook Pixel and explain what it is, what information it collects, and how this information is used. You can find more information on what you need in your policies by visiting the Information Commissioners (ICO) website.
You also need to make sure that your customers have the ability to opt out of being tracked, otherwise you’d be breaking the rules around data protection and could open yourself up to being fined by the ICO.

Installing a facebook pixel on WordPress websites
Although this article focuses on WordPress the process of installing a pixel will be similar on any other websites Content management system and we’re not detailing how to create a facebook pixel here, if you need to know how to set one up you can follow facebooks guide.
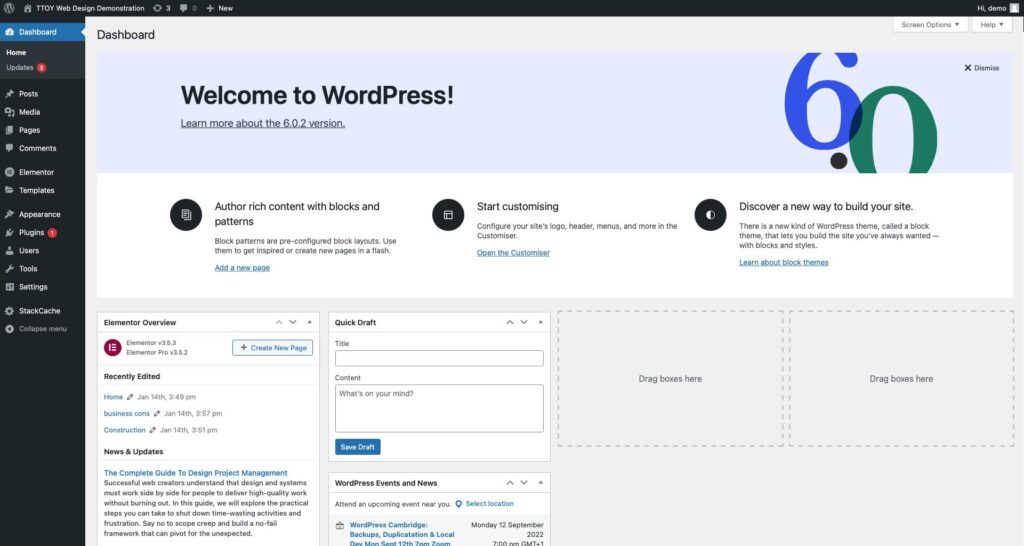
If you don’t know how to code the easiest way to add your pixel to your website is via plugin. You’ll need to log in to your WordPress site dashboard as an administrator. You can find out more about the WordPress dashboard in our WordPress Admin panel article.

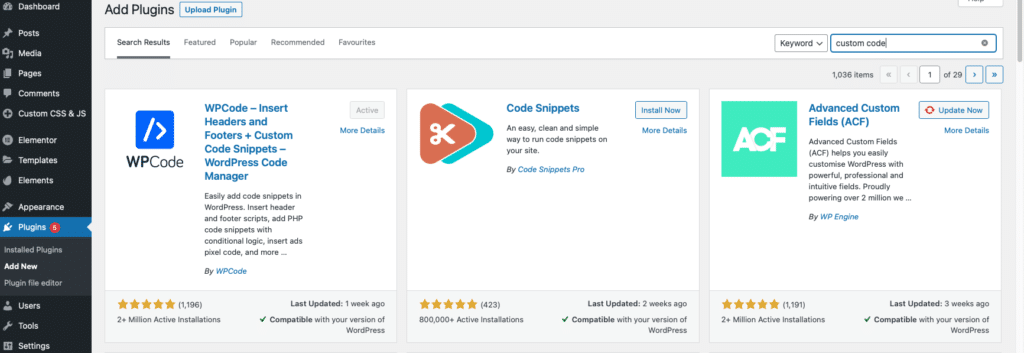
Head over to the plugin section and search for custom code. Once the search returns download a free plugin called WPCode.

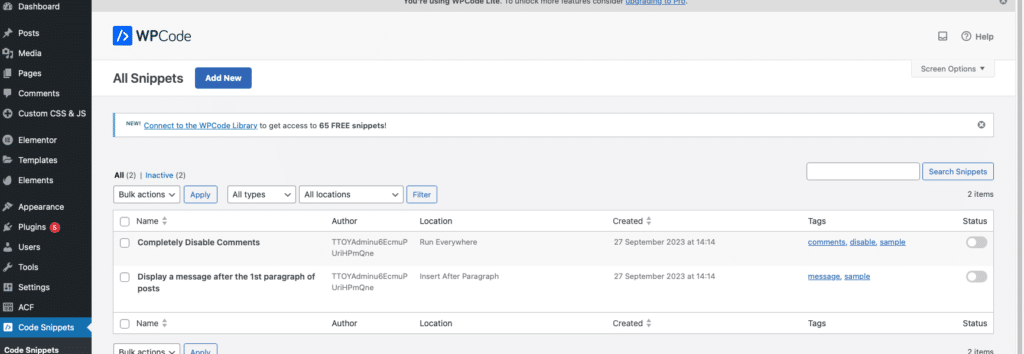
Once activated go to to code snippets plugin and click add new.

You’ll then need to click add your custom code (New Snippet)

This will take you to the code preview screen. Add a title – something thats easily recognisable like ‘Facebook Pixel’ so you know what its doing when you come to revisit the site in 6 months time.
Copy and paste your Facebook Pixel code into the code preview box, and remember to change the code type to JavaScript snippet.

We then need to choose how to insert the code onto our WordPress website, I recommend leaving it to Auto insert, but you could use short code if you wanted. You’ll then need to use site wide header.

Your tracking code must always be in the header as a header is the first thing to load, if you added the code to the footer you’d potentially miss out on those first interactions.
If you want you tracking code to be on a specific page, you use the smart conditional logic function as seen below:

Once the snippet is added head back over to Facebook to check and see if the code is working (remember you might need to clear you caches first).
As this is changing your websites code i’d aways recommend taking a backup and testing first on a staging or development site to ensure everything’s working as it should.
In conclusion, while the Facebook Pixel does come with certain challenges, its benefits make it a powerful tool for small businesses looking to maximise their Facebook advertising efforts. By understanding your audience better, creating custom audiences, optimising your ads and creating retargeting ads, you can drive more conversions and grow your business.

